Showing posts with label DIY. Show all posts

Friday, April 6, 2012

Eggs n things


Easter is this weekend. If your like me this year you've waited until the last minute to figure out what your doing. I searched high and low for some inspiration, and I'm loving what's out there on the blogs. 


These are by far my favorite dipped eggs.


This is one of the cutest ideas I've ever seen. A secret message inside your eggs. Love it


I'm a sucker for glitter so of course I need to post these from last year. Still wanting to do this for my kids.


and how about some crafts. These little eggs are too much. 


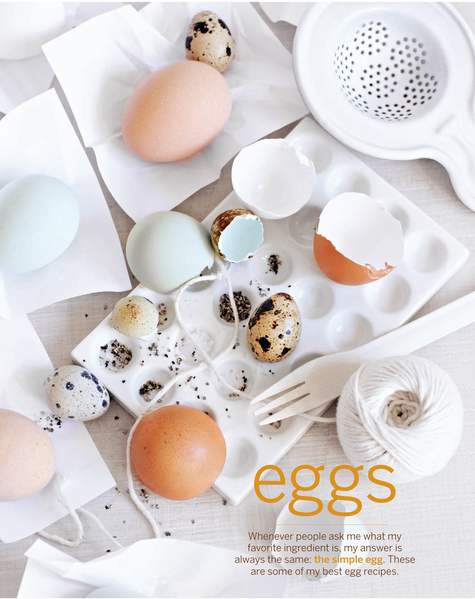
Anything food related check out Sweet Paul. There isn't any dish that doesn't look absolutely delicious. 


Crafting at it's finest for kids over here, check out this DIY for candy free treats. Love her blog


and Martha never fails when looking for easter DIY's


 Also check out young married chic. She's always cooking up a sweet treat and making it look adorable. These little eggs are no exception.

Have a Happy Easter weekend! 

Tuesday, February 14, 2012

heart day


I made these cute little lollipop cards for Jordyn's class. I left out her name in case you want to download it for your own. 
You're welcome. 


They were really easy. Once I printed them out, I folded them in half and cut three slits.
Then pushed the lollipop through the slits. 
Make sure you use heavy weight card stock otherwise the paper will rip. 


Valentines Day isn't too crazy over here, but I do like to have little subtle hints of love around the house. 
I got two banners made this year since I wasn't feeling like Martha Stewart. 
The felt heart banner here
&
The felt Ball banner here


I brushed the dust off my wreath I made two years ago at craft night and decided to finally finish it. I added the flowers on the left and called it a day. 


This morning the kids woke up to tin cans filled with suckers, cotton candy, I love you straws, and little dancing and singing Valentines day stuffed animals. 
Tonight will be date night with my love. 
Can't wait. 
Wishing you all lots of love!

Tuesday, December 13, 2011

Santa's Message

photo found on pinterest via Tracey Lau

So I discovered this very important Santa Clause message that every child should get a chance to see and hear. Click here to see one of the videos I sent to my child. Or click here to make your own. My kids are obsessed and have watched it possibly 30x's today. I cried the first time I saw my kids watch the videos. They are amazed.

Enjoy!!

Monday, December 12, 2011

It's Raining


There's a soft pitter patter on the roof this morning. 
And it hasn't let up.
It feels so nice to just lay in bed and 
listen to the rain. 
Knowing that today 
I'll get a lot done inside. 
It's going to be a link list day.

Find the DIY tutorial here for this lovely garland. 
Kris at Young Married Chic is making some cookies I really really need.
Mary at mygreendiet is doing a giveaway... ends tomorrow!!
Caitlin at Caitlin Wilson Design is doing a 2 day sale!
Nicole at Me Oh My reposted her Felt Garland tutorial.
Totally Rad is doing giveaways for the 12 days of Christmas!

Cozy up by the fire and your lit tree with your coffee or hot cocoa and call it a day.

Thursday, December 1, 2011

DIY-Christmas Globes


Project: Do it yourself Mason Jar Snow Globes. 


 I saw these adorable globes at Anthro and decided I had to give it a try and make them myself. It was really easy so I thought I'd share. 


1.
What you will need
Spray Adhesive Glue
Glitter
Mini Tree's- I bought a 21 piece pack at Michaels
Glue Gun
a bag of fake snow
a bag of small pine cones 

I also made globes with Snowmen and added glitter jingle bells- both from Michael's. 


2.
Spray the tree's with adhesive glue and sprinkle with glitter.
Let dry.


 For the snowman I bought three different sized balls (Small,Medium,Large) separately, 
each came in packs of 4-6 balls. 
 Glue gun the body of the snowman together using one of each size,
spray with adhesive glue, 
and sprinkle with glitter.


Turn the mason jar upside down and unscrew the cap. 
Arrange the tree's or snowman how you like on the inside of the cap,
then glue gun all the items to the cap.


Once the glue is dry add the fake snow, 
then screw the top back on. 
Make sure you don't turn the mason jar right side up. 
It will make a mess. 
Keep it upside down the whole time. 

Happy Crafting!!

Tuesday, September 27, 2011

Do it Yourself


Ikea Shadow Box Frames with Shells. 


I've been wanting to make these for a while now and I finally did it. It was so easy, I even made two more with coral branches and a Linen backdrop for my bathroom.

I bought the frames from Ikea.
Got fabric at Joanne's, nothing crazy expensive, actually super cheap.
Picked up some shells from a local shop and got to work.

1. Remove the back of the frame
2. Cut out a piece of fabric big enough to fit behind the Photo Mat.
3. Glued the fabric to the backing of the frame with a glue gun.
4. Then Glued the shells on with a glue gun.
5. Put the frame back together and your done.

Good Luck!

Monday, April 25, 2011

Easter Basket


Easter came quickly, was lots of fun, and left fast. I'm glad the candy is gone, because my kids ate nothing but it yesterday, however I miss all of our family around. This year I got the kids new Easter baskets, very simple from Michael's. I was inspired by another blog to make my own name tags for the kids and I like the way they turned out. I also stuffed all of our egss with stickers, necklaces, rings, whistles, and all sort of goodies from the dollar isle in Target and Walmart and they were a hit. I will definately keep doing it because the kids get more sugar then they need all year in one sitting.

Friday, April 15, 2011

TGIF - Craft Day


 It's so beautiful outside and it's FRIDAY... What a treat! So let's do some crafts. 


You'll need styrofoam eggs, glue, glitter, and letter stickers.


I was inspired by this, but I love me some glitter so we dazzled our eggs. Also we opted for styrofoam eggs because my neighbors' son is allergic to eggs. They worked surprisingly well. 


We also crafted these lovely little chicks. Aren't they adorable. 
Oh, the things you can do with foam. 


Have a safe and Happy weekend!

PS. Day 11 down 9 lbs! The vanilla shake and the nast Ionix Supreme has grown on me, believe it or not. However, the chocolate shake is still sickening. Still going strong. Now I just need to get my a** to the gym and work these bunz out.

Sunday, March 27, 2011

weekend Inspiration


This weekend I was catching up on my blog reading and I came across this post on one of my favorite sites for inspiration, 6th Street Design School. She featured Hailey's Rug, an awesome do it yourself project.

My goal this week... make this rug and put it in my living room by this weekend.
Related Posts Plugin for WordPress, Blogger...